Before you start
- BI Connector is installed and your license is activated. If not, start with installation of Desktop Edition (in PC clients) or Server Edition (in Server clients).
- You have your Oracle WMS instance URL handy.
- You have your Oracle WMS credentials (username and password for Basic auth).
- The
asyncExtract:truesetting is enabled for your Oracle WMS user.
Part A — Create the Data Source
Step 1 — Open the Data Sources section
Open BI Connector and click Data Sources on the left pane.
Step 2 — Create a new Data Source
Click New Data Source. Enter a name for your connection — for example, Oracle_WMS.
Set the Data Source Type to WMS.
Step 3 — Enter your Oracle instance URL
Login to your Oracle WMS instance in a browser. After successful authentication, copy the URL up to oraclecloud.com/company_code. The URL typically looks like: https://______.oraclecloud.com/company_code
Step 4 — Set up authentication
Fill the authentication details:
- Basic auth: enter your Username and Password.
Step 5 — Test and save the Data Source
Click Test & Save. If the details entered in the BI Connector app are validated immediately, a success message appears at the top right and your data source is saved.
Part B — Create the Table
Step 6 — Open the Tables section
Click Tables on the left pane, then click Add Table.
Step 7 — Name the Table and select the Data Source
Enter a name in the Table Name field.
Pick the Data Source you created in Part A from the drop-down.
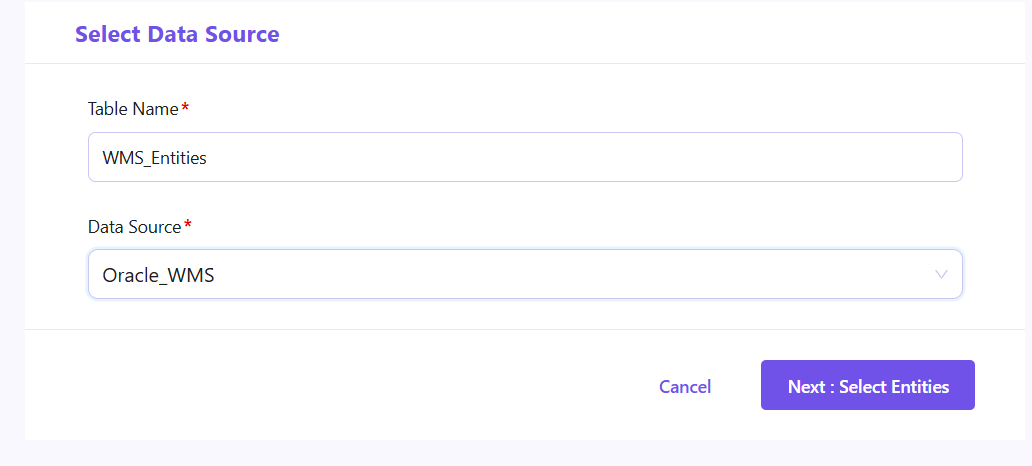
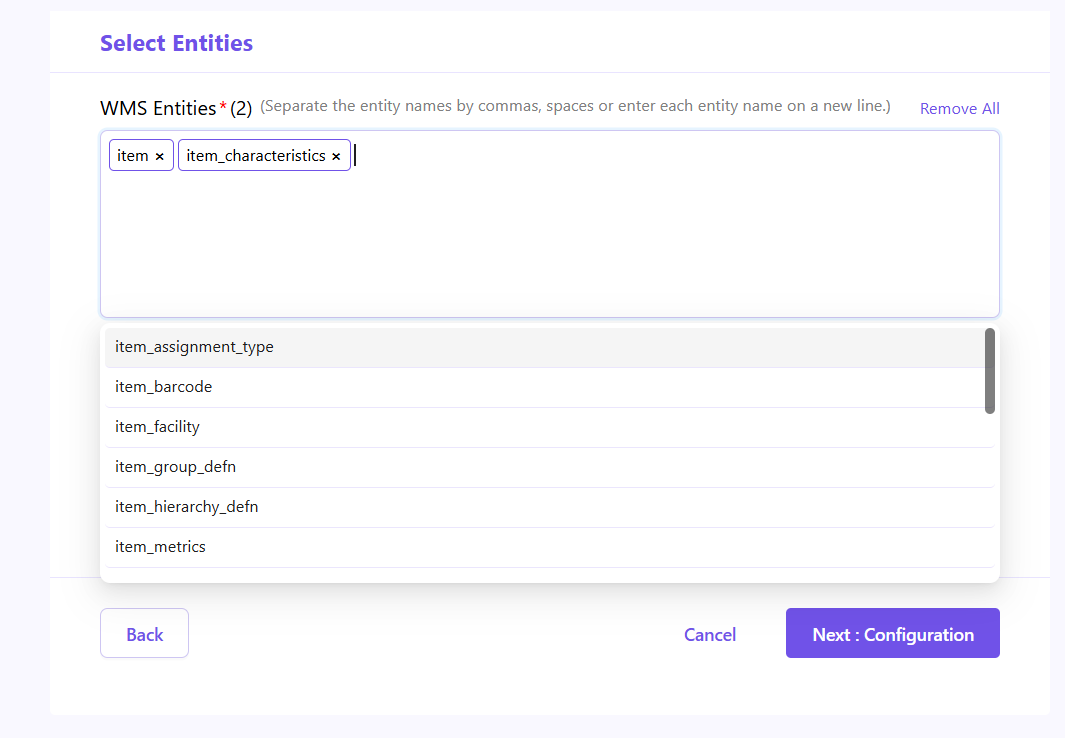
Step 8 — Select the WMS Entites
- Select the WMS entities you want to load through the data pipeline.
- You can choose entities from the dropdown or copy and paste multiple entity names at once, separated by commas or entered on separate lines.
- Once you have selected the required entities, click Next: Configuration to proceed.
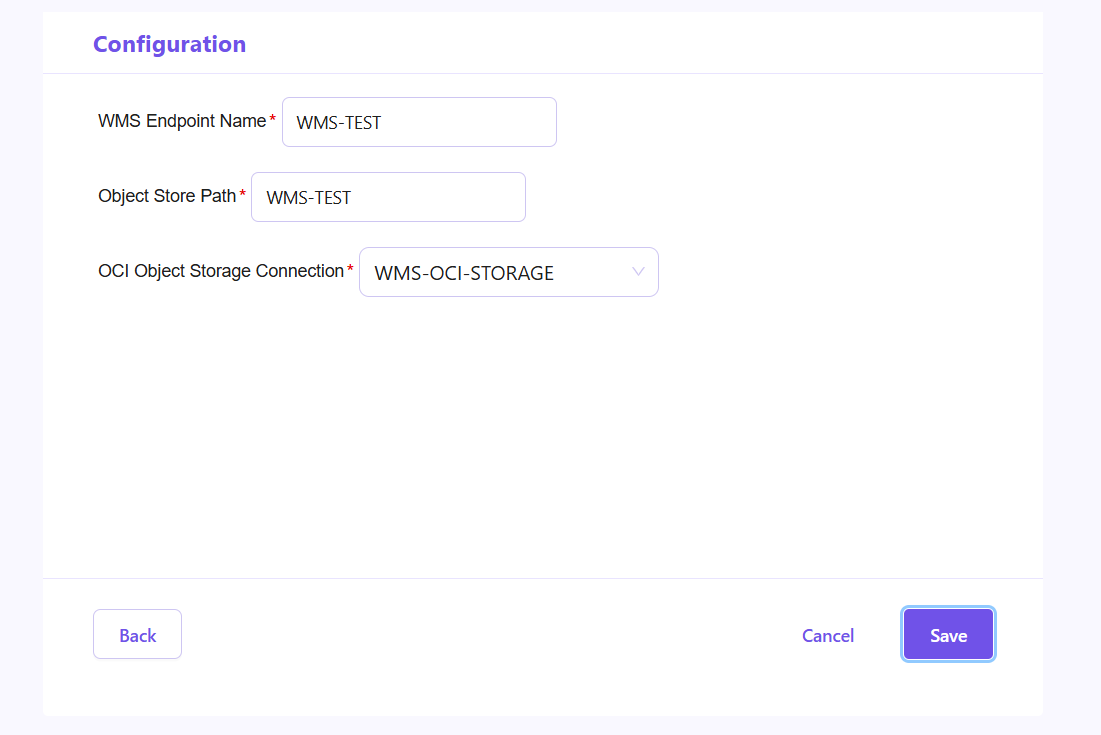
Step 9 — Configure WMS Endpoint and OCI Object Storage
- Enter the WMS Endpoint Name and Object Store Path, then select the appropriate OCI Object Storage Connection from the dropdown.
- This OCI Object Storage Connection must be configured under the External Storage section in BI Connector.
- These settings specify the WMS endpoint and the OCI Object Storage location where the extracted data will be stored.
- Click Save to save the configuration.
What would you like to do next?
| Your use case | Go to |
|---|---|
| Run Data Pipelines in Microsoft Fabric | Create a Lookup Table for Fabric Pipeline |
| Run Data Pipelines in ADF or Azure Synapse | Create a Lookup Table for ADF/Synapse Pipeline |