Before you start
- You have a BI Connector Data Source set up for Oracle WMS. If not, set up your Data Source first.
- You have the name of the destination schema and know which destination platform you are loading data into (for example, SQL Server, Snowflake, Databricks, Oracle, Fabric SQL).
- You have BI Connector table created for the required WMS Entities you want to pipeline to the destination platform.
Part A — Create the Lookup Table in BI Connector
Step 1 — Open the Data Pipeline section
Click Data Pipeline on the left pane, then click + New Lookup Table.
Step 2 — Fill in the Lookup Table details
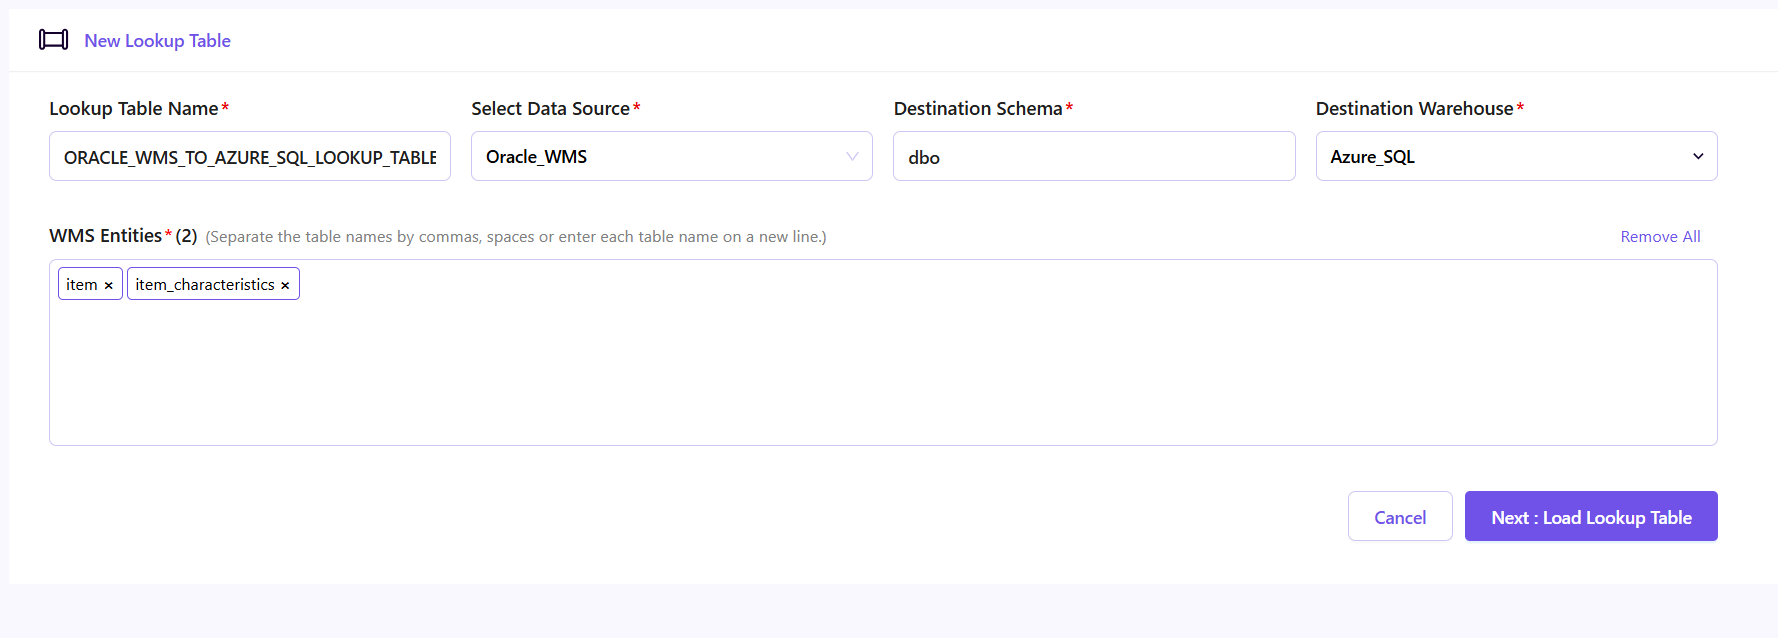
Fill in the following fields:
- Lookup Table Name — enter a name for this Lookup Table. This is the name that will appear in your destination platform.
- Select Data Source — pick your Oracle WMS Data Source from the drop-down.
- Destination Schema — enter the name of the schema in your destination platform where the Lookup Table will be created.
- Destination Warehouse — select your destination platform from the drop-down (for example, SQL Server, Snowflake, Databricks, Oracle, Fabric SQL).
Step 3 — Add the WMS Entities to pipeline
In the WMS Entities field, add the WMS Entities you want to move to your destination platform.
You can do this in any of the following ways:
- Type a WMS Entity name in the field and select it from the drop-down list that appears.
- Paste a list of entity names directly from Excel, or enter them as comma-separated values.
Step 4 — Load the Lookup Table
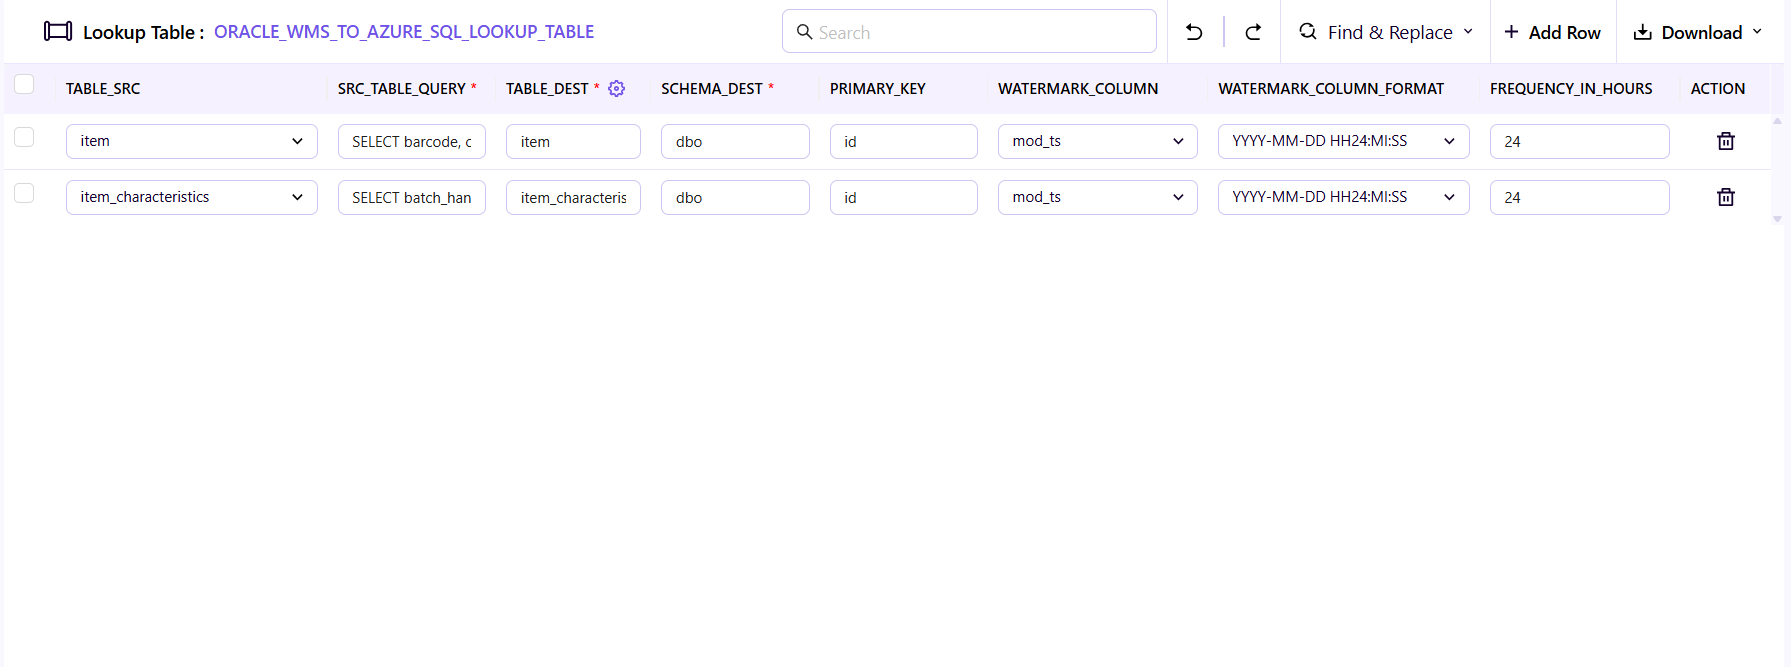
Click Next: Load Lookup Table. BI Connector will load the Lookup Table and pre-fill the details for each table, including the Watermark Column, Primary Key, Watermark Column Format, and Frequency in Hours where it can.
Review the pre-filled details and make any edits directly in the relevant cell:
- TABLE_SRC — the source entity name in Oracle WMS.
- SRC_TABLE_QUERY — the query BI Connector uses to fetch data from the source entity.
- TABLE_DEST — the table name as it will appear in the destination platform.
- SCHEMA_DEST — the destination schema.
- PRIMARY_KEY — the primary key column for the entity. To use a combination of columns as the primary key, enter the column names separated by commas.
- WATERMARK_COLUMN — the column used to track incremental changes (for example,
mod_ts). - WATERMARK_COLUMN_FORMAT — the date/time format of the Watermark column (for example,
YYYY-MM-DD HH24:MI:SS). - FREQUENCY_IN_HOURS — how often the pipeline refreshes this entity, in hours.
Step 5 — Save the Lookup Table
Once you have reviewed and completed all the details, click Save. A success message appears at the top right, and you are redirected to the Lookup Tables list where the newly created table appears.
Part B — Load the Lookup Table into your destination platform
The Lookup Table now needs to be created as an actual table in your destination platform so your Fabric or ADF/Synapse pipeline can refer to it when executing queries.
Step 6 — Download the Create and Insert statements from BI Connector
On the Lookup Tables list, click the ⋯ (three dots) next to your Lookup Table, then hover over Download SQL. Two options appear:
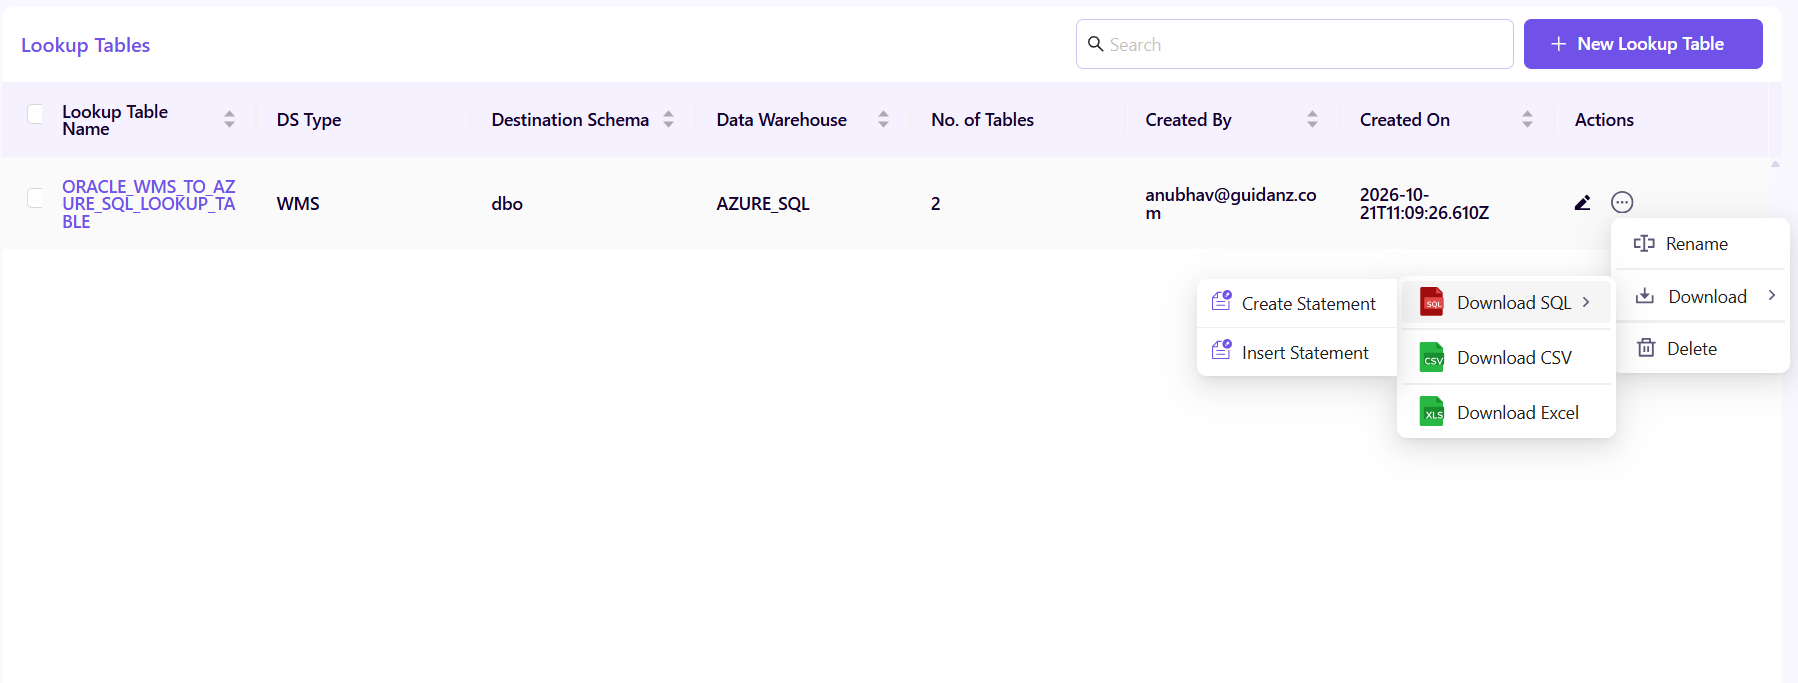
- Click Create Statement to download the SQL script that creates the Lookup Table structure in your destination platform.
- Click Insert Statement to download the SQL script that inserts the Lookup Table rows into the table.
Step 7 — Execute the statements in your destination platform
Log in to your destination platform and execute the downloaded Create Statement first, followed by the Insert Statement. Once both are executed successfully, the Lookup Table is loaded in your destination platform and ready for your pipeline to use.
What would you like to do next?
| Your use case | Go to |
|---|---|
| Create and run a pipeline in Microsoft Fabric | Create a Gateway Connection in Fabric |
| Create and run a pipeline in ADF or Azure Synapse | Create a Linked Service in ADF/Synapse |