Overview
The Data Comparison feature allows you to compare query results and SQL queries directly within BI Connector VS Code Extension. It helps you quickly validate data between different instances, environments, or query executions without manually reviewing result grids or using external comparison tools.
What problem does it solve?
There is no built-in way to compare the results of the same query when it is run against two different instances.
Without Data Comparison, users typically need to:
Open two query tabs and run the same query against different connections.
Compare the two result grids manually by switching between tabs and checking rows.
Export both result sets to Excel and manually align and compare the data.
These approaches are time-consuming and can easily lead to missed differences, especially when the result contains many rows or columns.
Follow the steps below to use the Data Comparison features in BI Connector:
1. Compare Results
Use Compare Results to compare the data returned by two query executions. It is useful for validating data between different instances or environments, such as Development vs. Test or Development vs. Production.
1.1 Result Tabs
Result Tabs allow you to keep multiple query results available at the same time. By locking a result tab, you can preserve its data while running the query again. When a result tab is locked, the next query run creates a new result tab instead of overwriting the locked result.
To prepare two results for comparison:
Run the query against the first connection, for example Development. The output appears in Result 1.
Lock Result 1 to preserve the Development results.
Change the connection to the second environment, for example Test.
Run the same query again. Since Result 1 is locked, the output is placed in a new Result 2.
You now have Result 1 (Development) and Result 2 (Test) ready for comparison.
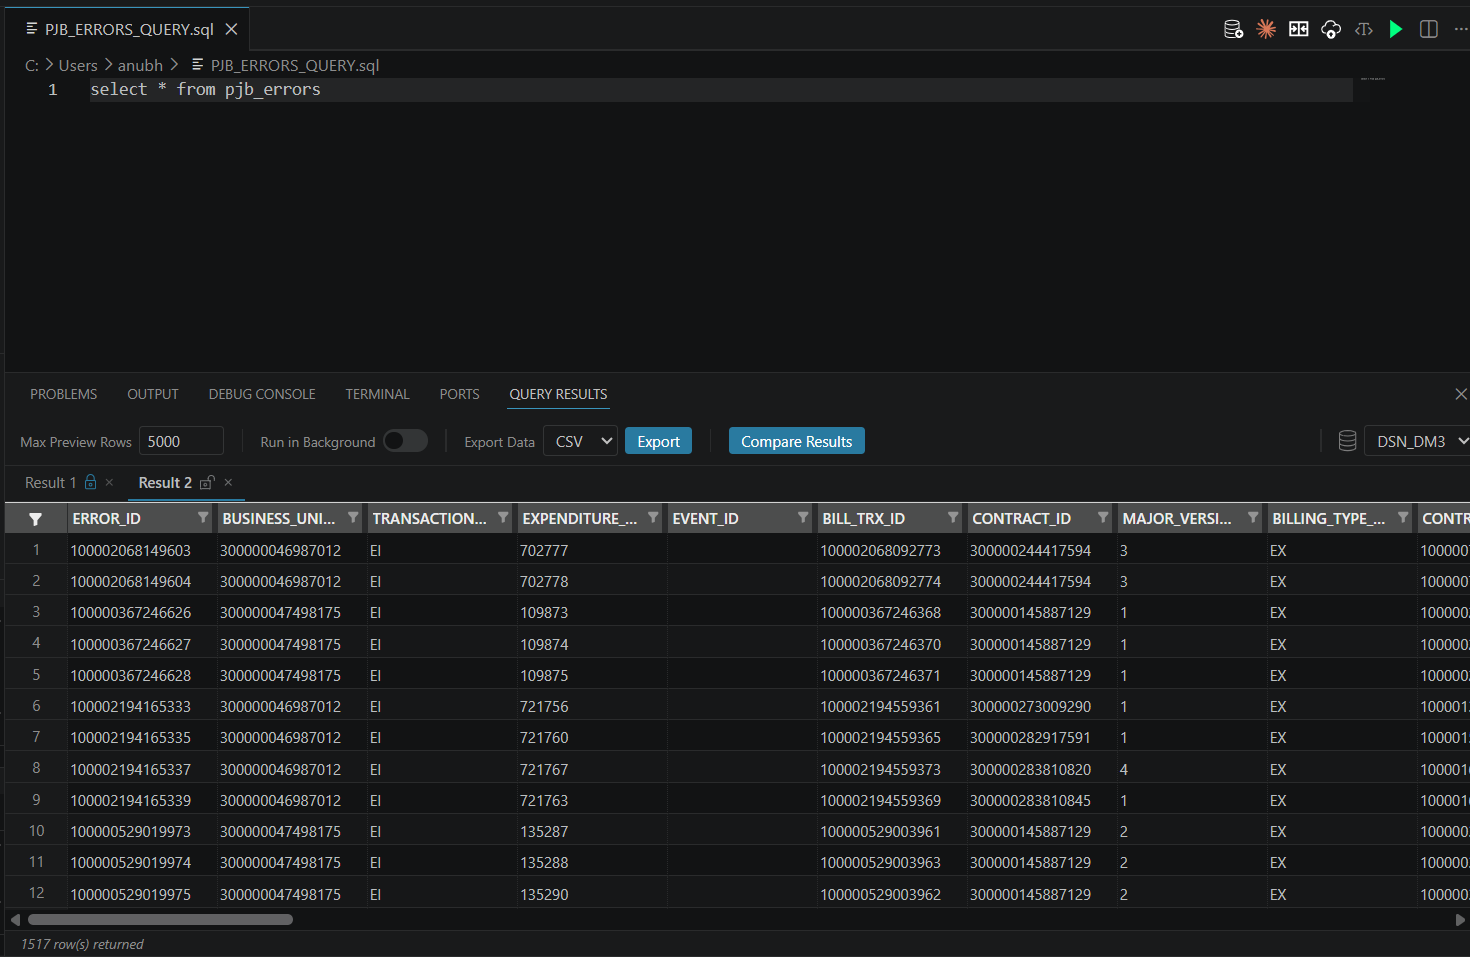
Each query tab can hold up to 5 result tabs. New query runs use the first available unlocked tab, while locked tabs remain unchanged.
1.2 Compare Results
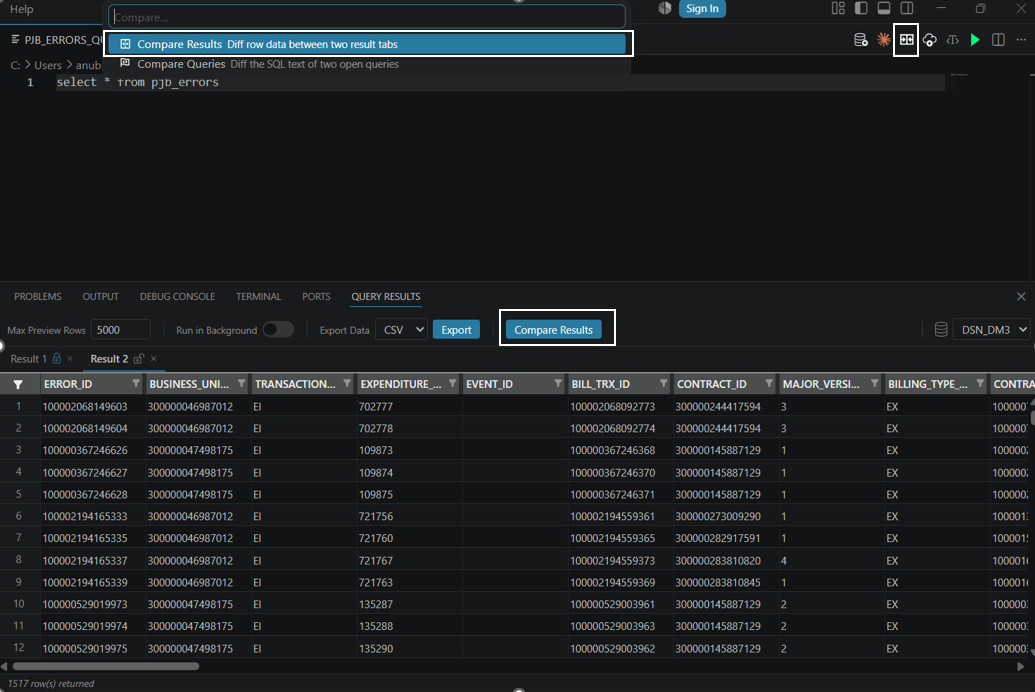
To open Compare Results, there are multiple options:
Click the Compare icon in the top toolbar, then select Compare Results from the command palette.
You can open Compare Results directly from the Command Palette using Ctrl + Shift + P and searching for Compare Results.
Click the Compare Results button in the result grid.
1.2.1 Pick the two result tabs
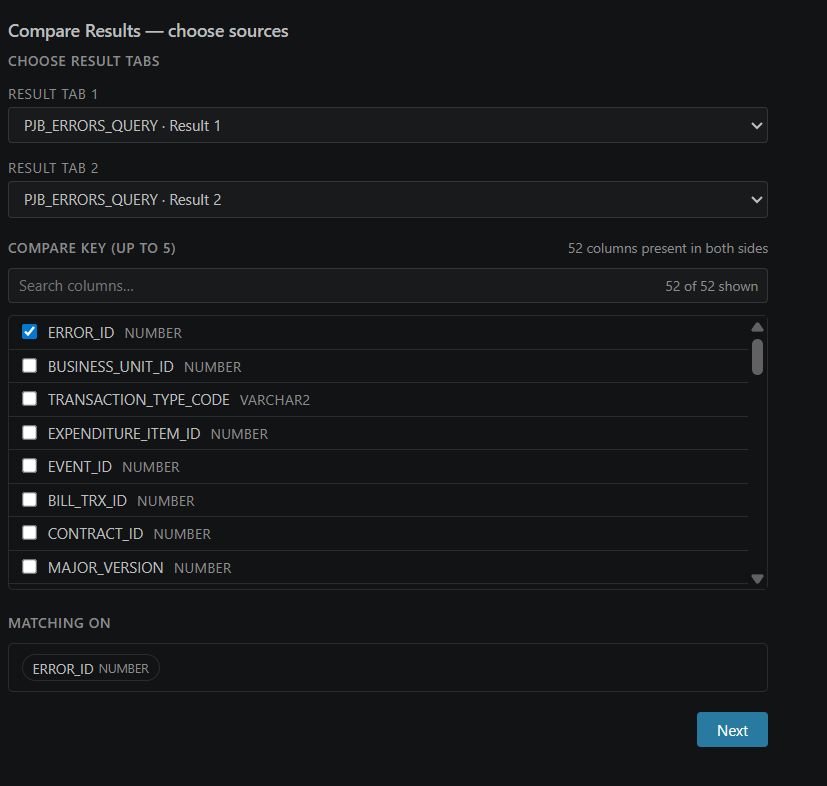
In the comparison window, select the two result tabs you want to compare. Any two result tabs can be used, from the same query tab or different ones, including locked ones.
1.2.2 Pick the compare key
Select a single column or multiple columns as the compare key. The selected column(s) must generate a unique value for every record on both sides.
If the selected key is not unique, an error message is displayed: "Selected keys are not producing unique records. Pick additional columns to form a unique key." Add another column to create a unique key.
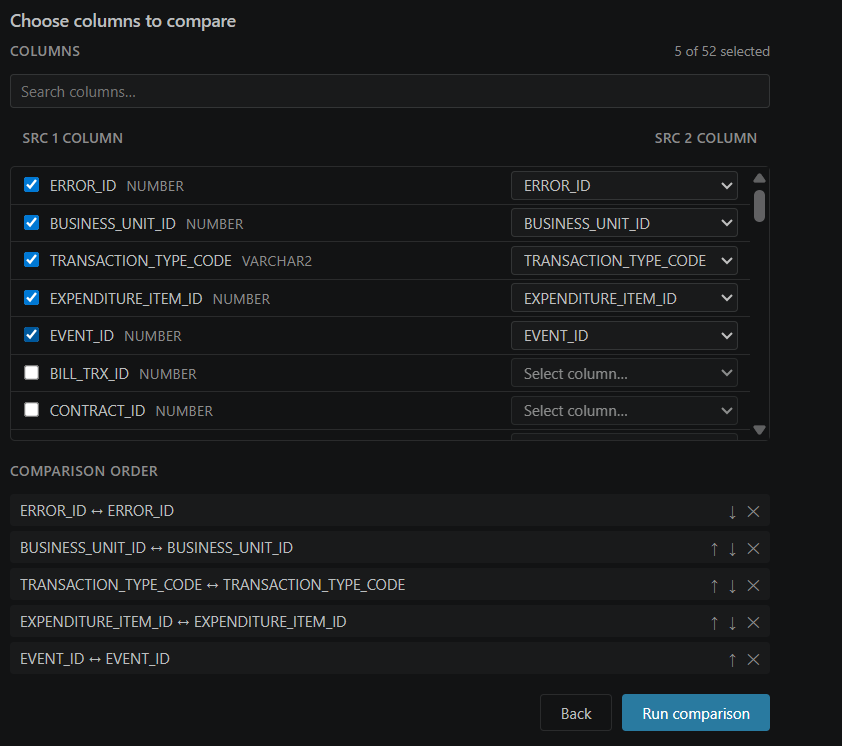
1.2.3 Pick the columns to compare
Select the columns you want to compare for value differences.
If a column has a different name on each side — VENDOR_ID on one and SUPPLIER_ID on the other — you can map them to each other here.
1.2.4 Read the results
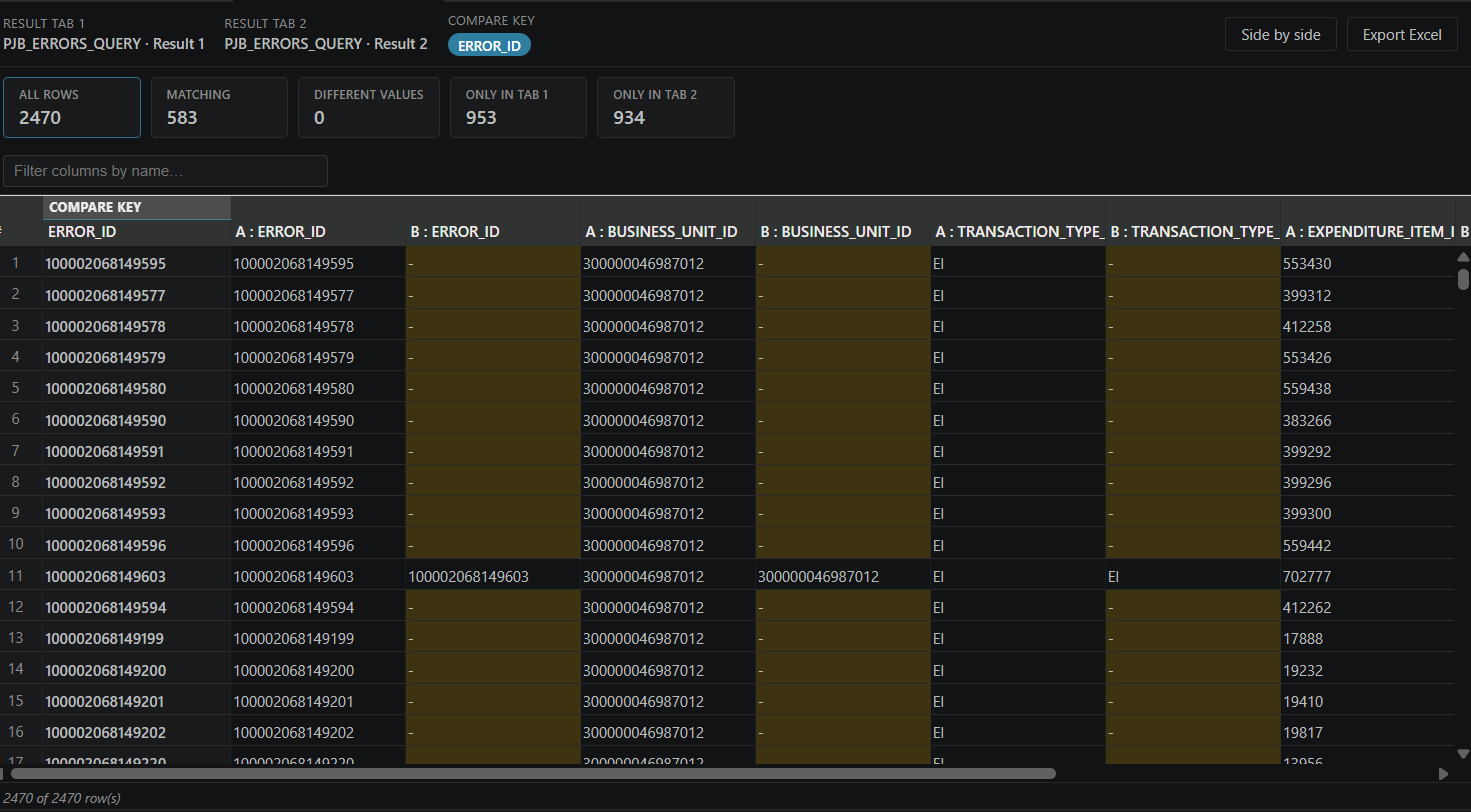
Every record falls into exactly one of four categories:
Filter bar: Five filters across the top — All, plus the four categories — each showing its count. The counts are visible before you click anything, so you can see the shape of the result immediately.
Colors:
Matching values appear in the normal text color.
Differing values appear in red, on both sides, so you can see what changed and what it changed to.
One-sided rows appear in yellow, with a hyphen on the other side where the record does not exist.
Layouts: For All, Matching and Different Values you can switch between:
Paired — the two versions of each column sit next to each other, easiest for spotting what changed.
Side by side — all columns from the first result set, then all columns from the second.
The two one-sided categories show as a single table, since there is nothing to compare against
1.2.5 Export
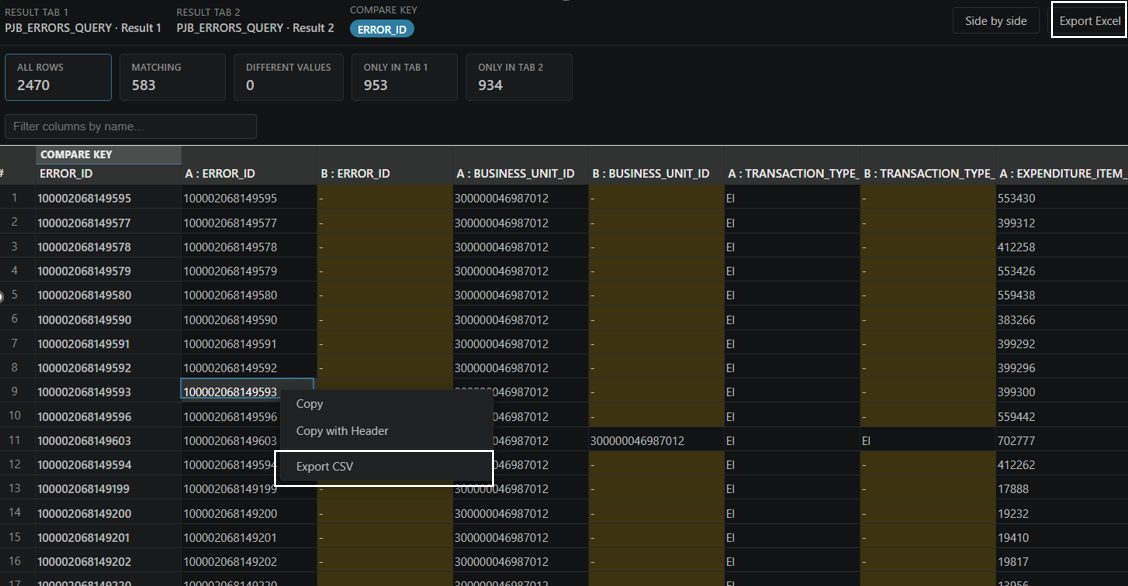
The comparison can be exported to Excel or CSV. The Excel export includes each row's category and which cells differ, so the information survives outside the application.
Note: Comparison tabs are read-only and session-only. They are not saved, and are discarded when you close the application.
2. Compare Queries
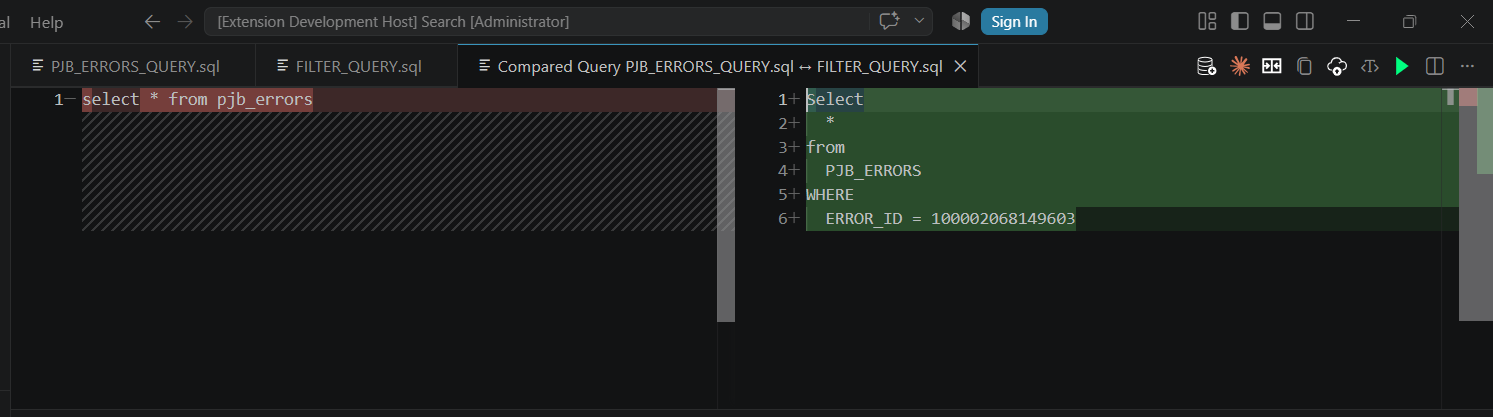
This compares the SQL text of two editor tabs, rather than the data they return. Useful when you have two versions of a query and want to see what changed.
To open Compare Queries, you can use either of the following:
Click Compare in the top toolbar and select Compare Queries from the Command Palette.
You can open Compare Queries directly from the Command Palette using Ctrl + Shift + P and searching for Compare Queries.
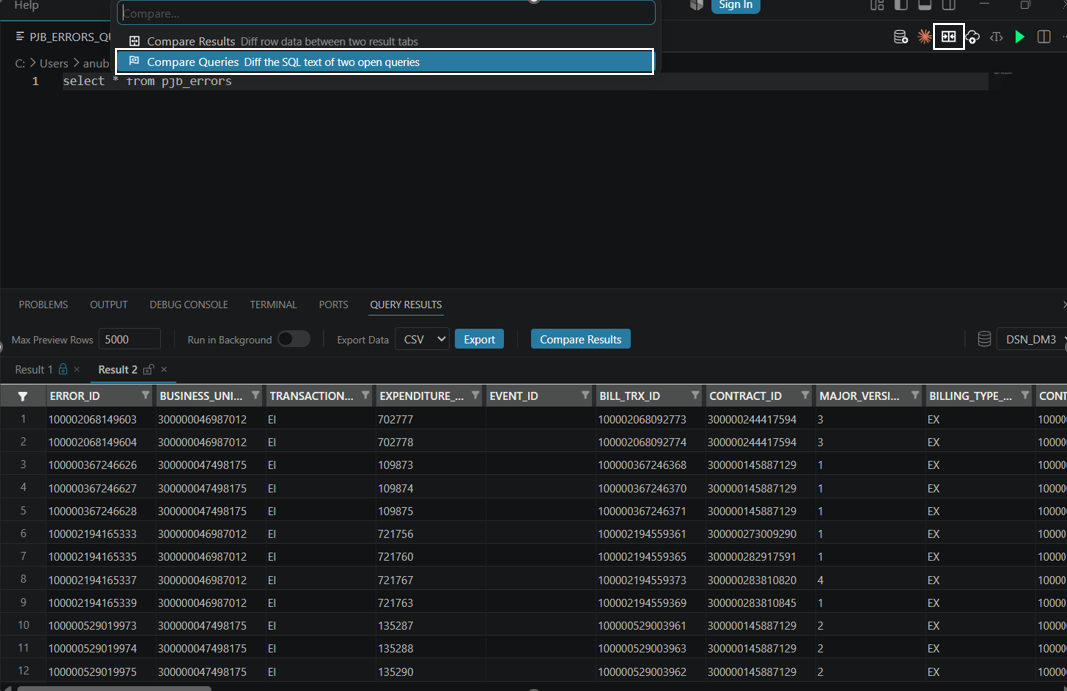
Select the two Query Editor tabs to compare.
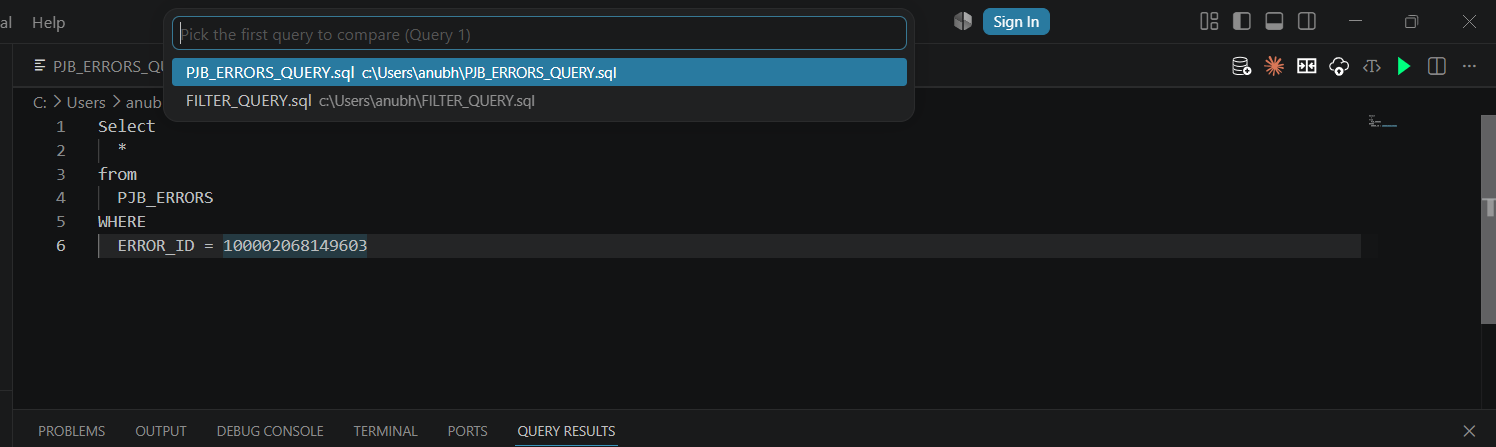
The two queries appear side by side with a line-by-line diff.
The Copy icon in the toolbar allows you to copy both queries to the clipboard in a single action.
Reading the diff:
Lines present only on the left are marked in red — removed.
Lines present only on the right are marked in green — added.
Unchanged lines appear as plain text.
Line numbers are shown independently for each query, making it easy to identify the location of changes on either side.